Cloud Sync
JELOS has built in support for multiple cloud sync options. These can be used to sync save files, games and other files between multiple devices.
Syncthing
Syncthing is a tool that lets you synchronize the contents of folders across multiple devices. It is different from cloud storage in that devices are updated directly with the latest changes from their peer(s) whenever they are online at the same time. Some things you can use it for with JELOS:
- Keep your game library synchronized between your computer and JELOS device(s),
- Keep all your handhelds synchronized (including those that run Android),
- Copy savegames as they are created and seamlessly continue playing on another device,
- Keep a copy of your configuration files for easier editing.
Setup
Setup on JELOS
- Make sure you are connected to a WiFi network before continuing.
- Go to "Network Settings" and set "Enable Syncthing" to "on". Make a note of your device's IP address, as well as the root password in the System Settings menu.
- On a computer or mobile device in the same network, open a browser and point it to "http://a.b.c.d:8384" where "a.b.c.d" is the IP address of your JELOS device.
- When prompted for a user name and password, enter "root" as user and the password you noted earlier.
- You should now be directed to a configuration page running on your JELOS device - we'll come back to this shortly.
Setup on Peer(s)
Install Syncthing on the device or computer that you want to synchronize with your JELOS device. If your other device also runs JELOS, simply repeat the above steps. Otherwise go to https://syncthing.net to download Syncthing for your platform. You may also find it in your Linux distribution's package manager, the Android Play Store, etc. Generally it is not required to install the same version of Syncthing on all devices. You can synchronize a folder across any number of peers.
Connecting Folders
- Go to the web interface of your JELOS device (see above). Don't worry about notices about upgrading or the file system being read-only, nothing you can do. (Note: You can also go to the web interface of any of the peers, it'll work the same - but for this documentation it is assumed that you're on a JELOS device.)
- Under "Remote Devices", click "Add Remote Device". Enter the Device ID of the peer you want to synchronize with. If the remote is in the same network as your JELOS device the ID will be shown automatically. Otherwise, you'll find it in the remote's web interface by clicking "Actions" at the top and then "Show ID". Give the device a name if you like.
- In the "Folders" section, click "Add Folder". In the popup window that opens, set a label and specify the path on the device (e.g. /storage/roms). This is the folder you will be sharing with other peers.
- In the same popup window, go to the "Sharing" tab and select the remote device you just set up. Optionally, go to the "Ignore Patterns" tab and configure those. Click "Save" to close the window.
- On the remote's interface you should receive a popup that a new device wants to connect. Click "Add Device" and then "Save" to accept. It should now show up under "Remote Devices".
- Still on the remote, you should receive a new popup saying that the JELOS device wants to share a folder. Click "Add", then in the popup window, specify the path to an empty local folder to store the synchronized contents. Click "Save".
- The folder should now be copied from the JELOS device to the remote.
Adding more Peers
- To share the folder with more peers, first follow step 2 on your JELOS device to add another remote.
- Find the folder you want to add another peer to and click "Edit".
- In the popup window, go to the "Sharing" tab. The new remote should appear as an option. Select it and then click "Save".
- Follow steps 5 and 6 on the new remote to connect the folder.
Things to Keep in Mind
Syncthing is not a cloud storage
In order for devices to synchronize, they need to be online at the same time. Unless you have one peer that is always on, this is different from an online storage like Dropbox or Nextcloud. However, this behaviour can be emulated (no pun intended) by installing Syncthing on a cloud server or an always-on Raspberry Pi.
Syncthing is not a backup
Folders are synchronized with other peers immediately as they come online at the same time - this includes changes and deletions! Be sure to make regular backups of your folders.
Devices do not need to be on the same network
Syncthing uses relay servers to ensure communication between peers. This means that there does not need to be a direct connection between your devices, no port forwarding, etc - as soon as they are both online they will find each other and synchronize. Although file transfers are end-to-end encrypted when they are sent through relays, be aware of this if you plan on using Syncthing for anything more sensitive than your save files.
Using Syncthing for Saves/States
Using Syncthing for savegames is great because it allows you to seamlessly play a game across multiple handhelds, or even other devices. For example, you can play a game of Super Mario 64 on your RG353 while on the go, then launch the game on a RetroPie or PC running RetroArch and your save game will be transferred automatically to be continued on the big screen. However, this comes with a few caveats.
RetroArch differentiates between saves, i.e. the battery or memory card storage featured in the original game, and states, i.e. the save state feature that is part of the emulator. While saves are often compatible across different versions of RetroArch cores, states tend to break more frequently. This means that if you create states with two incompatible versions of an emulator and they are synchronized, you may lose one of them.
- For maximum compatibility, make sure to use the same cores on all devices and update them at similar frequencies.
- RetroArch uses two separate folders for saves and states. This makes it easy to choose whether you want to synchronize only saves, states, or both.
- In the RetroArch settings under "Saving", you can tell RetroArch to sort saves and states into subfolders based on content directory or core name. It is highly recommended to make use of this to reduce the risk of accidentally overwriting an incompatible save or state.
- Make regular backups of your save folders.
Synchronizing with Android
- For Android-based handhelds people seem to be recommending the Syncthing-Fork from F-Droid.
- Keeping Syncthing running in the background on Anroid may severely impact your battery life and reduce standby time. Check out these tips to help you balance battery life and synchronization times.
- Using cross-platform versions of emulators is much more likely to introduce incompatibilities so be extra careful when syncing savegames.
Further Documentation
For any questions and advanced configuration, be sure to check out the full documentation at https://docs.syncthing.net/index.html.
Rclone
Using Rclone is easy, however configuration must be performed manually before it will function correctly.
rclone.cfg is stored in /storage/.config/rclone/rclone.conf and can be copied from another device but only after the destination device has booted into Jelos (so copy to secondary sd, boot device, launch 351files, copy from there to proper path above)
Setup Rclone
Credentialed Access
To set up rclone, open an ssh connection to your handheld using PowerShell ssh, putty, or ssh on Linux and Mac. * Username: root (all lower case!) * Password: (To get the root password, press Start, then Select System Settings.) * Connection: (Your device, example RG552 or RG351MP.)
Example using PowerShell ssh, Linux, or macOS:
ssh root@RG552
Setting up Rclone
Now that you're connected you will need to configure Rclone. This process is menu driven, but also requires steps on your PC. To complete configuration of Rclone, run rclone config in your ssh session and then follow the provider documentation and headless configuration steps to configure it for your cloud provider of choice.
See detailed setup example below
Using Rclone
In JELOS you are able to mount your cloud drive like any other storage device, as long as you are network connected. To mount your cloud drive, press Start, select Network Settings, and then select the Mount Cloud Drive option. This drive is available on /storage/cloud by default, and is accessible from ssh and from 351Files. To mount the cloud drive over ssh use rclonectl mount to mount the drive and rclonectl unmount to unmount it.
Note: Mounting the cloud drive is not persistent, you will need to select it before use.
Using Cloud Backup and Restore
In the tools menu you will find two options, Cloud Backup, and Cloud Restore. These tools will back up or restore your save games and save states by connecting your cloud drive and copying them. These tools are configurable by editing /storage/.config/rsync.conf and /storage/.config/rsync-rules.conf.
Note: The cloud backup and restore tools are destructive, but they do not delete data by default. Deletes are left to the user to manage.
rsync.conf
The rsync.conf configuration file contains parameters used by the cloud tools that provide the path for your cloud drive to be mounted, the path to sync the data from, the destination for the sync and rsync options for cloud backup and restore. The configuration is user editable, and the defaults are as follows:
### This is the path where your cloud volume is mounted.
MOUNTPATH="/storage/cloud"

### This is the path to your game folder on your cloud drive.
SYNCPATH="GAMES"

### This is the path we are backup up from.
BACKUPPATH="/storage/roms"

### This allows changes to the rsync options for cloud_backup (pending stable release)
RSYNCOPTSBACKUP="-raiv --prune-empty-dirs"

### This allows changes to the rsync options for cloud_restore (pending stable release)
RSYNCOPTSRESTORE="-raiv"
rsync-rules.conf
The rsync-rules.conf configuration file contains the pattern used by rsync to know which files to backup and restore. This file is user editable. The default settings are as follows:
# This is a required rule for subdirectory matching.
+ */

### Do not include BIOS.
- bios/**

### Retroarch saves
+ *.sav
+ *.srm
+ *.auto
+ *.state*

### This is a required rule to exclude all other file types.
- *
To create custom match rules, use - to exclude and + to include. Use caution as a mismatched rule can copy every single file from the source path or no files at all.
Detailed Example
This example configures rclone to use Dropbox
Rclone provide detailed examples for connecting to all supported cloud servers, including Rclone Dropbox example
Configure cloud backup connection on JELOS device using ssh
From the terminal command line type
and press enter
Note the version number, which is required for a later step

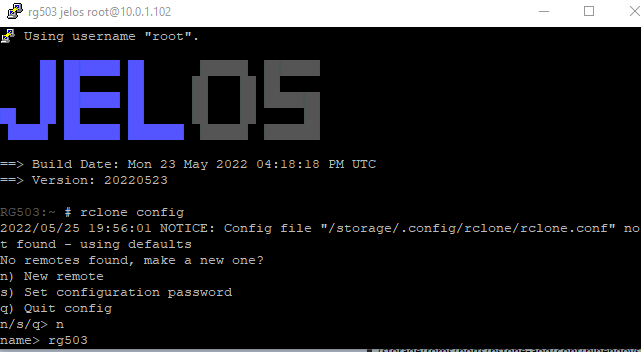
Now type
and press enter
type n to create a new remote site
type in a name for the site (use a name without spaces), then press enter
rclone suggest using
remote, but in this example the remote site is calledrg503don’t include spaces in the site’s name. Rclone does allow names that include spaces, but rsync will fail if a site name with spaces is used in the cloud backup script.
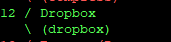
Choose from the list of cloud providers that is displayed. For Dropbox, type 12 and enter in this example
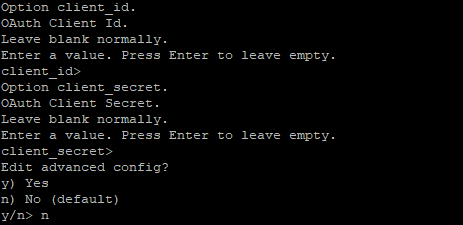
The next options displayed are slightly different from the Dropbox example on rclone website
For client_id and client_secret press enter and enter to skip, or read Rclone Dropbox example for details about setting up your own App ID (rclone App ID is shared with all rclone users by default)
Type n to skip editing the advanced config
For auto config, select n for remote or headless machine (i.e. JELOS device that doesn't have a web browser)

Instructions are provided explaining how to authorize the connection from the remote device to the cloud service
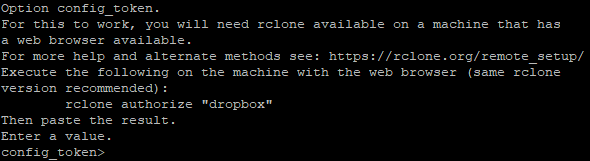
Install and run rclone on machine with a web-browser to authorize connection to cloud service
Download rclone on a device with a web-browser so rclone can use a web-page to authorize the connection by allowing you to login with your authorization credentials for the cloud service
Download the same version of rclone as is installed on JELOS device, as noted above.
Use terminal window (e.g. CMD on Windows) to browse to rclone executable and run
and press enter

Rclone will launch a web page to enable login to the cloud service and authorization of the connection
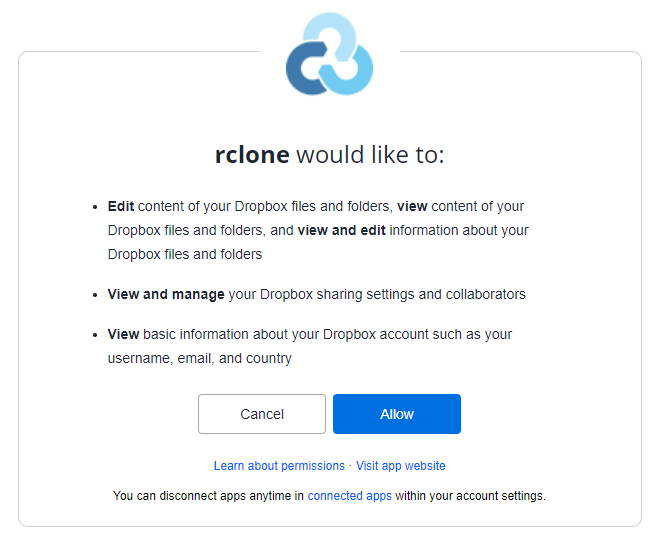
After successful authorization, the terminal window will display the authorization token that needs to be pasted into JELOS ssh

Copy the entire token
Update JELOS with authorization token
Paste authorization token into JELOS command prompt, then type y to confirm that the remote connection is correct
The connection is now configured and can be tested (q to quit rclone config)
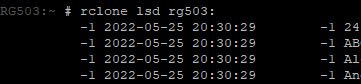
Type
where rg503 is the name of the remote connection (rclone example names the remote connection as remote)
don't forget to add
:to the name of remote connection
The names of the top-level folders within Dropbox cloud service will be displayed